PP1 Mk1
| TYPE | MFG | PART NAME | STATUS |
|---|---|---|---|
| motor | iFlight | Xing2 1404 4600KV | — |
| aio | HAKRC | HAKRC F722 40A | — |
| camera | Caddx | Nebula Pro Nano | — |
| frame | Peter Petermann | PP1 Mk1 | — |
| canopy | Peter Petermann | PP1 Mk1 C1 | — |
| tpu | Peter Petermann | PP1 Mk1 Cam Mounts | — |
| rx | HappyModel | HappyModel EP2 | — |
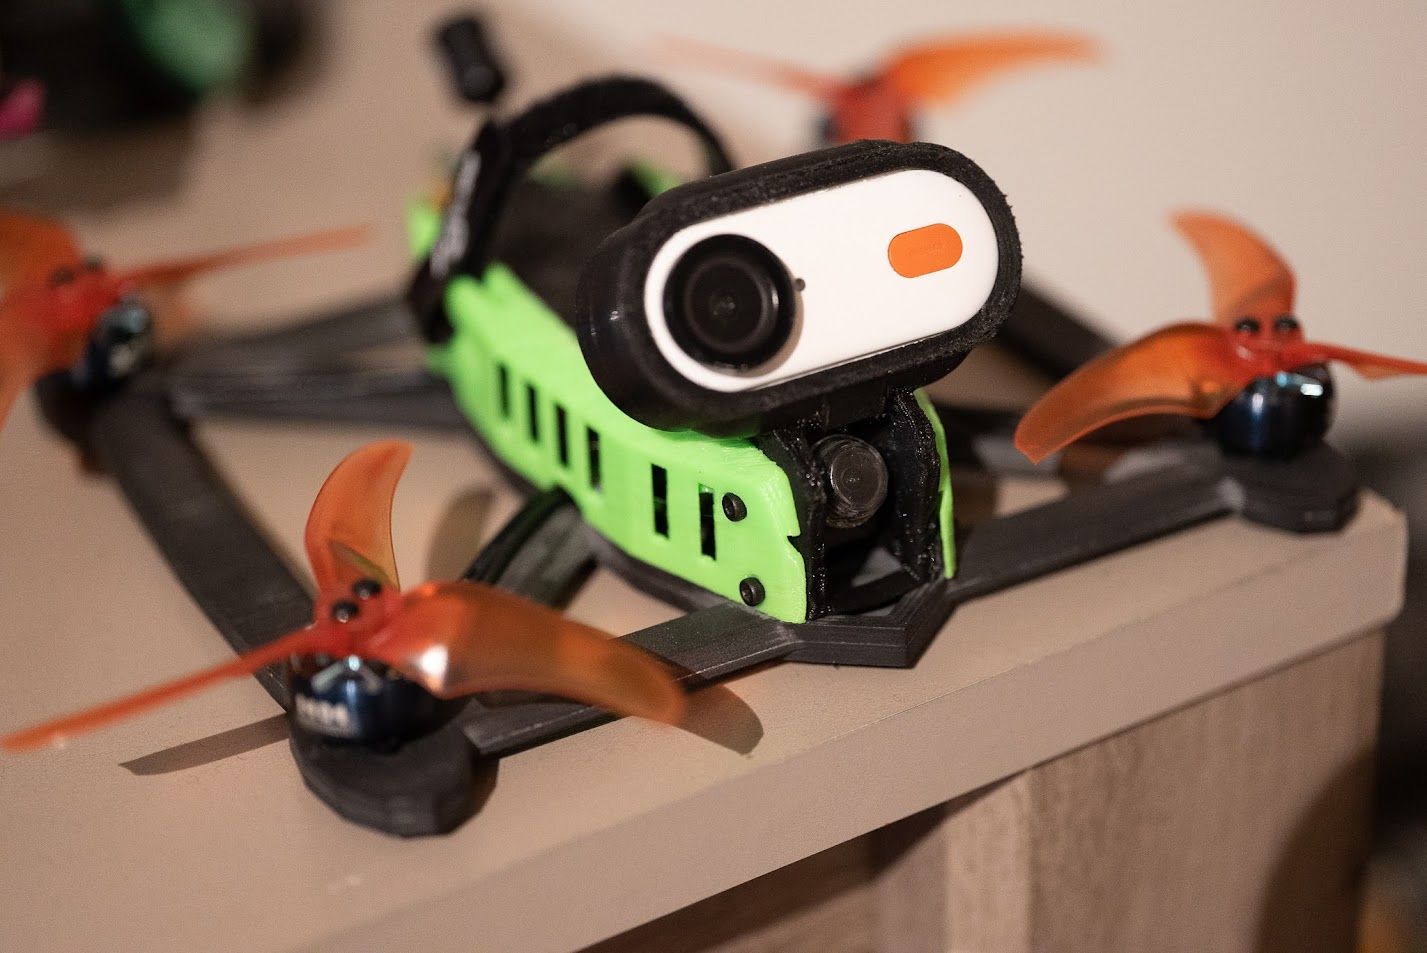
The PP1 MK1 my first self designed FPV drone frame
To get this out of the way: 3D printed designs for drones have problems - most drones are build on basis of carbon-fiber frames for a reason, anything you can print does not have the same stiffness or toughness a carbon frame would have.
3D printing is amazing technology and it makes prototyping and learning easy - and that was / is the purpose of this project. I started on the journey to build this drone with a set of learning goals - if you think that 3d printing drones is a waste of time, you might not be wrong. On the other hand if you think 3d printed drones is the way to go - curb your enthusiasm, you won't get the greatest flying drone out of it.
The Idea
The Idea was simple - knowing the problems of 3d printable materials I knew from the start there would be a few trade-offs to be made, in this particular case:
- Size: I decided for 3.5", as I like the format, but also as I know that while being able to get enough weight budget out of it, the smaller size will make vibrations and the lack off stiffness less of a problem
- Material: you can't print carbo-fiber yet, and the materials you typically print on home printers aren't great for this - PLA i to brittle, TPU, PETG or ABS not stiff enough. So for the first prototypes I went with PETG to get the form down, but ultimately I had the frame printed in multiple materials (to test) by a company from italy, as the materials and processes they offer are vastly superior to what I could do at home - this comes at a cost.
- Adding the horizontal bars between the motors for more stiffness - this hinders some of the airflow from the propellers, but makes the arms wobble a lot less.
Some of the design goals were:
- ability to have a caddx peanut on there
- ability to do dji digital stack based on the vista air unit
- ability to mount an AIO board (I added holes for a 20x20 stack as well, beause, why not?)
- mounting system for full canopys (to build custom variations on the platform/frame
The Journey
I started with the frame, the first iteration I printed in green PETG, just to get a feel for how my design translated into print - and I found a few problems with my design right away - for example I had managed to orient the screw holes for the motors wrongly, so the cables would face in an awkward direction, and the material to hold the motor screws was too thin. It also didn't have a way of mounting the canopy yet.
The second Iteration, also green PETG fixed those issues, while also adjusting the distances of the holes a bit allowing for some space between components and sidewalls.
Based on the second Iteration I started working on the first canopy, which in its first throw was rather simple, and didn't have ways to fit the TPU parts yet, but with it I also added the mounting points to the frame itself, which for a last time printed in green petg - once satisfied that the mounting works, I ordered the frame printed in 3 materials:
- Nylon PA12, printed in MJF - this is what I've used for my tiny champion canopies before, I expected this to be not stiff enough, but its the cheapest of the three I ordered, and I really wanted to know how it compares to the others
- Nylon PA12 + Carbon Fiber fill in FDM - slightly more expensive, I expected some extra stiffness here, while losing the nice texture MJF creates
- PEEK with Carbon Fiber fill also in FDM - this is sold as a material to prototype metal parts with, so its quite resistant to a lot of things, while at the same time having a good stiffness to it
While I was waiting for the frames to be delivered, I started working on the front and back TPU parts, the front one being the mount / protection for my FPV camera, the back one being the mount for the antenna, and holding the xt30 plug in place. In both cases this meant smaller modifications to the canopy, and once I had the firt prints out and fitting, I quite quickly modified the back one to allow sqeezing my ELRS rx below the back mount.
When the PA12/MJF print arrived, I put the first flyable version of the drone together, and went out flying it - and to the suprise of everyone there - including myself, this was flying a lot better than I had expected. Now there is some vibration in the arms, but it sounded good, flew decently, and the motors stayed cool with the default tune.
Once I cam back I started working on a variant of the front-tpu-camera-mount that allowed to mount the caddx peanut as well - once that was done and the other two frames had arrived, I transplanted everything to the PEEK frame.
The Materials
the PA12 MJF Frame
I've been using PA12 printed using MJF for the canopies of my Tiny Champions before, so I knew beforehand that this Material wouldn't be ideal, but I still wanted to know how it would actually fare, as its the cheapest of the three, while at the same time having a much nicer finish thanks to the MJF printing. Suprising everyone who was there, this did fly much better on its maiden flight then I'd have expected - the problems with the stiffness where there as predicted, but a lot less pronounced then I was fearing. Overall, it is flyable (on default betaflight settings).
the PA12+Carbon Fiber FDM Frame
This is definately more stiff than the PA12 MJF one, but the print doesn't seem very clean, there is some detail missing. I haven't been using this one yet.
the PEEK+Carbon Fiber FDM Frame
when trying to manually bend this, it seems to have an amazing stiffness, close to what other 3.5" frames in Carbon Fiber have. Its finish is OK, and it got all detail. To be tested soon.